_

Showing posts with label printmaking. Show all posts

Sunday, January 7, 2024

Linocut


One of the most challenging concepts for teaching printmaking to students is getting them to understand what prints and what does not. In the past I've done some activities with notan design and positive negative space drawings. What I found is they still were unclear on what to carve and what to leave alone.

This year I made a sample plate with 4 examples of the same shape and printed it in front of the students and passed it around. It was very helpful and during the cutting processes multiple students asked to see the sample plate to confirm their choices.


We talked about how their sketch (usually a line drawing) would be the hardest thing to carve because there is so little material that stays raised up.


They seemed to grasp the concept a bit better. Our theme was nature. They could choose a plant or animal and were encouraged to switch ink and paper colors. I had one student finish early and do a variation on a reduction print by recarving more material out and printing a second color.


If you need some help with your printmaking lesson, this includes 10+ minutes of narrated demonstration. Drop your questions in the comments and I'd be happy to help.


Monday, January 17, 2022

Snowmen at Night Printmaking Video Demos


If you're looking for a printmaking lesson that can be scaled up or down for a variety of grade levels, this is a favorite. Inspired by the book snowmen at night, students can create crayon rubbings (K-1) marker prints (2-3) and traditional prints (grades 4-5). 


Original post from 10 years ago here.


Friday, March 19, 2021

Printmaking Workshops

Over the past week Art 4 students have been catching up on a variety of printmaking techniques using a workshop format. Many of these amazing students have lost the opportunity to engage with authentic materials over the past year in their Art 2 & 3 classes during covid for the Spring and Fall semesters. I want them to experience the joy of printmaking without worrying about a finished perfect project. 

Their first encounter was using gelli plates. Here are the results of the first attempts:


Here are some fun explorations:


Student's first monotype using watercolor on plexiglass

Student's set up for the monotype. Soap used to break surface tension.


Rubber bands on gelli print on newspaper


Marker Print on drawing paper (styrofoam plate)


Layered block print on a gelli print on a worksheet. 


Layered block print on block print on magazine paper


Block print on roll-off paper (used for cleaning brayer)


Layered block print on a gelli print (stencil)


Layered block print on a gelli print (stencil)


They will begin planning their printmaking project and choose from a range of techniques having had an appropriate amount of time to learn and experiment. I made a video  for the remote students including some of these techniques as well as a video for creating dry point prints with recycled materials from their home.


Friday, March 12, 2021

Printmaking Projects For Every Age

You can't deny the magic of printmaking.

I've taught K-12 and there isn't a grade that doesn't love printing. After a quick survey, my Art 4 students had no memory of doing printing of any kind, and since more than half of my class is remote this year, I made a video that covers a full range of techniques. We are workshopping our way through them all, and they will pick their favorite for their assignment. 


K-1

Your youngest students are more than capable of collagraphs and simple rubbings. Students with poor motor skills may need to start with texture plates and peeled crayons prior to staring collagraphs.

Stamping is also an excelled option for this age group. Advanced students may be able to use cookie cutters to create simple styrofoam plates for rubbings.


2-4

Advanced stamping or stamping as mixed media will be a delightful option for these students.

Elementary students who have mastered the basics of printmaking are able to create marker prints and some basic monoprinting methods. They can be very successful with foam printing plates, carved with a dull pencil.


5-8

Middle School students are able to carve simple plates and stamps. Some students can be trusted to carve linoleum blocks at this age. Substituting with an eraser is a popular choice for many middle school art teachers.

Middle Schoolers are able to complete more advanced monoprinting techniques and may ready to safely handle fragile gelli plates . Marker prints with more detail are still appropriate and enjoyed at this age.

9-12

High school students who have been previously exposed to a range of printmaking processes may be able to handle serigraphy, rust printing and reduction prints requiring advanced registration.


What are your favorite printmaking projects and what age group do you teach? If you're looking for printmaking clip art like the images used in this post for your own illustrated directions or word wall, you can find some here.


Monday, February 18, 2019

Design Process Continued

Still working through the stained glass lesson idea.


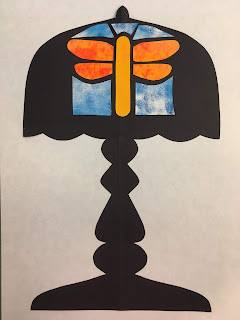
Today I tried making the stained glass fit into the shape of a tiffany lamp. The paper is too thick to stick nicely to the styrofoam cup without a great deal of effort. Not abandoning the idea forever, but for now.


They can still choose window, vase or lamp, but it will be a paper collage this year.


The presentation, color photo directions, worksheets and more are now available on TpT.

Monday, December 10, 2018

Gingerbread Prints


Inspiration strikes in the weirdest moments. Like when you're baking cookies and realize that you could use the cookie cutter to make a shape on styrofoam for printmaking.


You better believe I threw out whatever lesson was planned for the next day and we made these in kindergarten. For more fun....they had to bring their plates back to me one table at a time. I placed them on a cookie sheet and we printed the whole batch together. So much fun!

If you want to try it - my lesson plan includes a very helpful demo video. There's a marker print option and a crayon rubbing option depending on the skill level of your population. Could easily bump this up to 1st, 2nd or 3rd grade.


Tuesday, December 5, 2017

"Pop" Corn

New lesson for fourth grade will combine pop art, printmaking and corn.


Will be great for using up all the random 2 x 9" scraps of foam I seem to have inherited.  Thinking we can get this done in three classes. Art history connection with artist John Clem Clarke. Lesson plan for sale on TpT.


Updated 3/9/19 - This lesson is still a favorite. Just added a time lapse video to the listing.


Wednesday, November 11, 2015

Printmaking With a Twist

So excited about a lesson that I road-tested with my daughter and neighbor today. It's a twist on an old favorite. I'm thinking of this for 3rd grade. Instead of printing the same image they will modify the plate each time, adding a snowflake.


Could extend the lesson an additional week by collaging curtains or painting the back of a head as a silhouette (or just for early finishers). The three week lesson with my symmetry worksheet and step by step visuals are available here.

Wednesday, March 12, 2014

Printmaking Lesson

4th grade is finishing up their printmaking projects. Having them use a gridded drawing really helped. Each students made up to four prints and selected their two best to turn in for grading. Some of the students really liked and chose to include their ghost print.


Tuesday, April 9, 2013

Fishbowl Printmaking

I tried the lesson from last month's School Arts magazine with my first graders. This was a three week lesson for my first grade students.

Week one we practiced drawing many types of fish. I used step by step drawing books and photocopies at each table. The students folded their papers into eights and followed along with me at the board to draw the first two fish. Then they could choose any they liked to fill their paper.

Week two I demonstrated the entire process of creating a plate and making prints from the plate. Students then went back and selected one fish drawing from the first week and traced that onto their styrofoam plate. (I had these precut to fishbowl shapes by tracing a butter lid off the edge of the paper.) Older students could easily do their own. This would have been an entire 40 minute class period for my crew.

Week three we did a quick review of the printing process and I showed them where to find supplies and where to store prints when done. Each table had a thick sponge on a foam tray. The sponges were wet on one side so students could pick up the sponge and swipe it across their paper. My class made two copies each without reloading the plated. I explained the second would be lighter and this is called a ghost print. The students write their names and table # immediately on both sheets of paper before I placed the markers on their tables.

Possible extension/Closure: Read the story "Rainbow Fish" and take a small sheet of fancy paper and cut it into enough spaces for each child to glue a special scale to their fish.


Supplies:
Styrofoam plates (5" square per student)
Crayola waterbased markers
Sponges
Drying Rack or clothesline

Friday, December 14, 2012

Printmaking Snowman Lesson


Second grade students just finished their snowmen prints.


 I gave them the chance to make more than one. They will add permanent marker over top to embellish. Taking a few pictures now in case they get ruined during the next step.


My lesson plan for this is posted over at Teachers Pay Teachers. It includes step by step visuals and professionally designed lesson plan templates.