_

Thursday, December 28, 2017

Nice to Magritte You


So very excited to share a brand new lesson today. Over the summer I received the amazing book "Magritte's Marvelous Hat" by DB Johnson and I've been trying to decide which grade level and project would go best. There were so many fabulous illustrations in the book that I couldn't pinpoint which one to focus on. (Spoiler alert...the pictures in the book morph and change with acetate pages) That's when it became obvious this should be a PRINTMAKING lesson. Now my students don't have to choose either. Face in the clouds? Check! Clouds in your face? Check. Floating hat? Check!


There are lots of options with this project. They can take selfies, use grids to draw their face or work from imagination. They can choose symbolic objects in place of the apple, it's really up to you (and them!)


By keeping the printing plate rather simple - just a silhouette, the students can marker print all of their cool ideas and make a variety of prints. I was so excited by this idea, I had to make a video which I'm sharing here. And I know how precious our time is, so I'm also offering the full lesson plan right here.

Can not wait to unleash this on some third graders next month. Happy 2018, all!

Saturday, December 23, 2017

Candy Cane Lane

Third grade learned about one point perspective during this candy cane lane oil pastel project.


Wednesday, December 20, 2017

Tuesday, December 19, 2017

Free Choice Centers

The following are essential items for running a successful "Free Choice" day in my art room. While the systems and procedures for how students can earn a free choice day have varied over the past six years, these are my tried and true favorite things to include, many of which lend themselves to steam activities.


Most of the games above are used with 3rd-5th only due to complexity or amount of time to set up.
Castle logic, brain builder junior and the puzzle could be used for any of my classes.


These items are good K-5. The bag in the bottom right is playfoam and lemme tell ya. They love it. If you haven't tried it before, it's like a cross between model magic and rice krispie treats. You can pull it apart and put it back together. I've had this bag over a year and used it 3x per year with 30 classes per week. Still works.

Original post on games here and here. Older posts about earning Free Choice day here and here.

Saturday, December 16, 2017

Nutcrackers


Second grade made these standing nutcrackers after watching a quick 3 minute "how it's made" video clip and practicing symmetrical and asymmetrical poses. We compared the plain silver handheld nutcrackers to the more decorative types and had interesting discussions about aesthetics. Their projects were done with marker on card stock using 12x18" paper. They drew a line about 3" from the bottom before we started to draw so they the nutcrackers could have a base.

It took them three sessions.


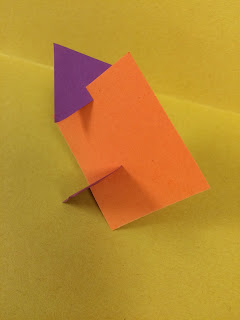
They loved learning how to cut a notch in the band to make them stand up. Several students have been making lots of little drawings and action figures stand up using this technique. Love the idea, but no time to plan? Check it out here.

Friday, December 15, 2017

Galaxy Paintings

Fifth grade learned about analogous colors, tints and shades while making these gorgeous galaxy inspired paintings. Download the lesson here.


Tuesday, December 12, 2017

Turtles


After kindergarten and first grade completed the exploratory art centers for "Yertle the Turtle" they began a studio lesson. Kindergarten created a "Mack Stack" by illustrating a scene from the story, but placing Mack on top of the tower. They used sharpie to create a variety of shell patterns and then watercolor to paint the turtles.


First grade sculpted turtles from model magic, which took two sessions. In session one they learned how to change the color of model magic and create marbled effects. We looked at illustrations of turtle shells to closely observe the real colors.


Using a 1oz package per student, they created a pinch pot shell from one half of their material. The other half was used to make the head, tail, feet and belly. During their last session we looked at the radial designs on the shell and decided that repeating shapes, starting with the center was the best way to go. They drew on the dried model magic with sharpies.


I've updated the resource for this lesson plan to include the turtle sculptures. Available here.

Tuesday, December 5, 2017

"Pop" Corn

New lesson for fourth grade will combine pop art, printmaking and corn.


Will be great for using up all the random 2 x 9" scraps of foam I seem to have inherited.  Thinking we can get this done in three classes. Art history connection with artist John Clem Clarke. Lesson plan for sale on TpT.


Updated 3/9/19 - This lesson is still a favorite. Just added a time lapse video to the listing.


Monday, December 4, 2017

Artist in residence

Today was the last session with our visiting artist, Mallory Zondag. Every student in 3rd-5th grade choose a flat piece of felt to contribute to the piece and every student K-2 choose either a sphere or a cord to include. All other pieces were theirs to keep. She will combine all of their pieces onto the giant 5' x 5' felted background that all students worked on in class and it will hang prominently in our school.


Thursday, November 30, 2017

A New Throne For Yertle

Kindergarten and 1st grade designed and built a new throne for Yertle the Turtle. After reading the story and discussing the characteristics of good leadership, we decided Yertle needed a new throne, so he would stop standing on all his friends. Students visited three centers where they designed with marker, built individually with play-doh and worked in teams building with blocks.


Lesson plans available here.

Wednesday, November 29, 2017

Kindergarten Collaborations


Kindergarten has been working their way through paper sculpture at one of my schools. After studying and practicing planar sculptures in the style of Alexander Calder, we moved onto collaborative paper sculptures by looking at the found object work of Louise Nevelson and creating paper assemblages on 6x6" paper.


To teach the lesson, each table had one paper sculpting technique "sample" and each student had their own background paper. They had to try to make the example on their own by experimenting.


Every 5 minutes I would switch out the samples (easier for me to move 6 paper samples then for 24 kids to change seats 5 times!) After their final technique was added, they brought their paper back and we glued it onto a giant piece of posterboard.


For our third week of paper sculpture, we looked at the story quilts of Faith Ringgold. Since they had just finished collaborating on the Nevelson project, it was easy to link into quilts. We talked about quilting bees and other ways artists can work together. I then shared the work of contemporary artist Suzan Shutan. Inspired by her tar paper installations, students created loops and began adding to a classroom piece by directing the placement of their individual loop.


They used marker to create pattern inside their loop, but the outside of each loop remained white to create a unified design. All four kindergarten classes are displayed together in the hall and will eventually move into my classroom.


Monday, November 27, 2017

Updated Organization

A few years back I had posted a few tips and tricks I had picked up along the way. I updated the list today with some new ideas, photos and routines. One of which is my "class counts" cheat sheet. This is a super simple chart I make in excel with the number of kids in each class, broken down by day and grade level. (The bonus of using excel....it does the math for you!)


I print it out 6 to a page and tape that thing wherever I find myself counting out supplies...especially next to the paper cutter! If you struggle with organization this is a free download on TpT. Enjoy!

Wednesday, November 22, 2017

Felted Spheres

During our 30-minute classes today the K, 1 & 2 students made spheres with felt. This may become rocks or pebbles in the final design. This was the second session with our artist-in-residence, Mallory Zondag.


Sunday, November 19, 2017

Candy Cane Lane

Teaching 3rd grade 1-point perspective with these gingerbread houses on Candy Cane Lane.


They have already completed a pumpkin patch painting using the casual devices of perspective (scale, overlapping, details and placement) and are now ready for more formal perspective. They started laying our their drawings last week and I think this is going to be more successful since they have that foundation of perspective already mastered. We're working on kraft paper so the gingerbread will not be colored and the frosting really pops. My sample is colored pencil, but I'm going to let them use oil pastel.

Wednesday, November 15, 2017

Artist In Residence


Our visiting artist, Mallory Zondag, started today and it's been amazing to watch the students blossom under her guidance. We are constructing a living wall of fiber using wet felting techniques. Every student K-5 has the opportunity to add to the collective 6 foot square background. Grades 5, 4 & 3 are creating sheets of felt that will be needle felted on top of the background while 2nd, 1st and kindergarten are creating cords that will be used as textural embellishments.

For the flat pieces the students tear and place five thin layers of wool roving, alternating the layers as they stack them on their mat. The mat is a piece of pool covering but you could use a sushi mat or bubble wrap.

A mesh screen is placed over the five layers and then the warm soapy water is used to scrub over the entire pile. We used an olive oil based soap.


Next, they remove the screen and roll over top of the felt with a pool noodle wrapped in the other end of their mat. They agitate for about two minutes. Then we added five more layers to the pile and repeat. They could change color if desired.


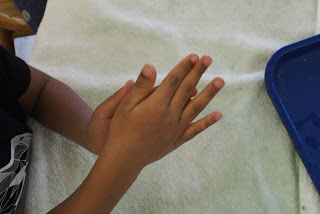
For the corded pieces, students received about a yard of roving to wrap around their palm several times. They dunked their hand in the soapy water and rubbed their hands together to agitate. They needed to rotate the wool around the hand so that it was evenly felted. After a few rotations they had  to unwrap the cord and squeegee off the excess soap.


We store the kits by rolling the mats around the pool noodles, stuffing the screen in the open hole of the noodle and securing with a rubber band.


Here is their progress so far: