_

Showing posts with label supplies. Show all posts

Friday, February 2, 2024

Paint Organization and Distribution Tips

 Here are some quick tips to make paint distribution and storage easier in your high school art class. This system has worked for me in a 41 minute period setting and a 78 minute block setting. For reference, this is a small classroom (no walk in closet) and another teacher uses my room during another block as well.

Option 1: Individual palettes. I have a shelf for students to keep their palettes on. Assigning a numbered spot let's them know that I know who's being messy. I can fit 20 of the 7" round palettes with wells on each shelf. 

Pro: cuts down on waste. Easy to save mixed colors

Con: have to mist with water and wrap palette daily. 


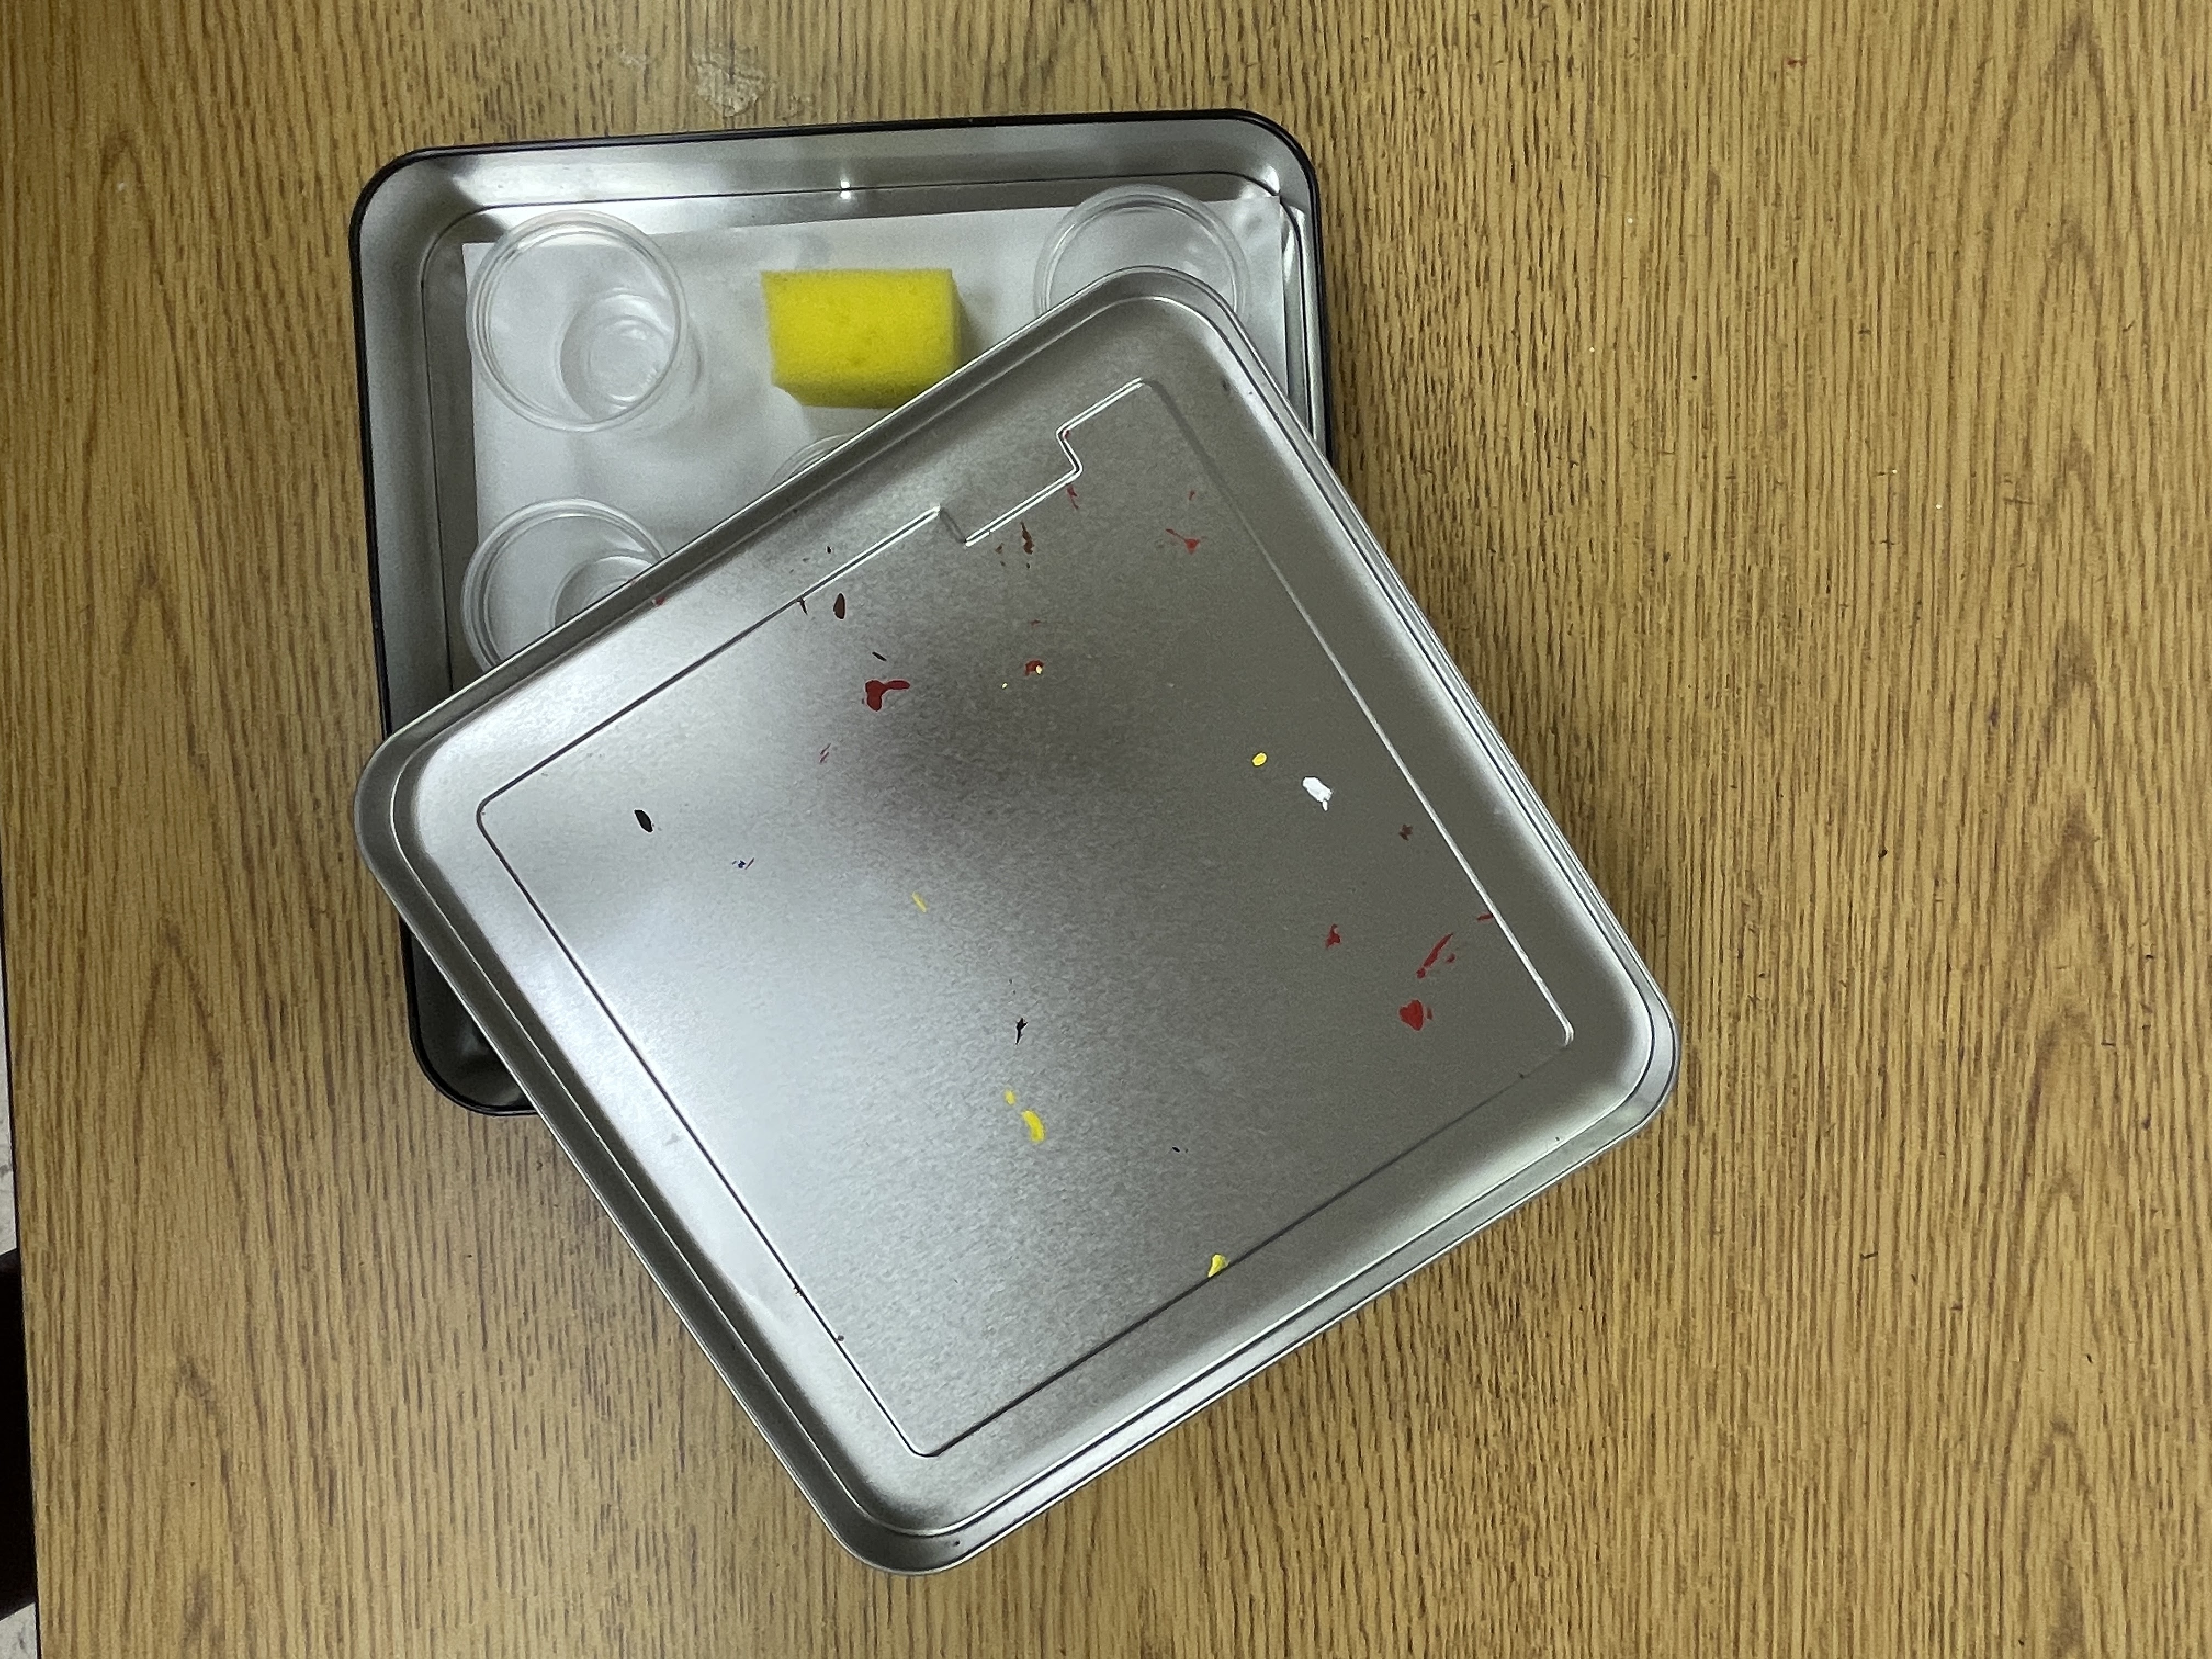
Option 2: Cups of paint. I have a tin of each primary, secondary and neutral color. Each pair of students gets 1 cup of each color to share. They access it from a communal table. At end of class they return the cup. I mist all tins with water and put the lid on. You can also add a wet sponge to keep paints moist over a long weekend. For my upper levels I have two kids share one of these tins for the duration of the project.


Pro: These stack neatly and take up less room than traditional palettes.


You could also use cheap dollar store pencil cases


Con: Students will need palette paper, you need to buy and replace the cups or trim the palette paper to fit the size of the box.

Tip: I keep the wax / palette paper in a readily accessible location for quick self service.


For paintbrushes you can try the over the door shoe hanger. I number each kit and each pouch space. 
At the end of class I can scan quickly to see who's missing. Also, I don't have enough for every student. Student #5 in my first class shares with Student #5 in my second class. I tell them to let me know if the brush is dirty at the beginning of class. Then I make a note to speak to that student the next day. It only takes 1 or 2 kids for them to realize that they can't get away with not washing brushes.
Pro: kids check brushes instead of you, saving time.
Con: brushes not cleaned last period of day will be gross the next day
Fun Fact: sometimes students tell on themselves. I had a kid show me a horrible brush. When I looked to see who shared the set, the student in the other class was absent. So he was the last to use (and not clean) the brushes.


Sunday, July 31, 2022

High School Organization Ideas for New Art Teachers

** UPDATE** ALL of these (and more) can now be found in a FREE 15 page download.

This is a post to easily share my answer to some of the common questions that pop up each fall in my high school facebook groups.

Q. How do you store student artwork?
A. Flat, dry work in progress goes inside their personal folder, stored on a drying rack. 
     
Flat, wet work goes on top of their folder on the drying rack. I number the shelves (they get a number for everything. Their folder goes on their shelf number.


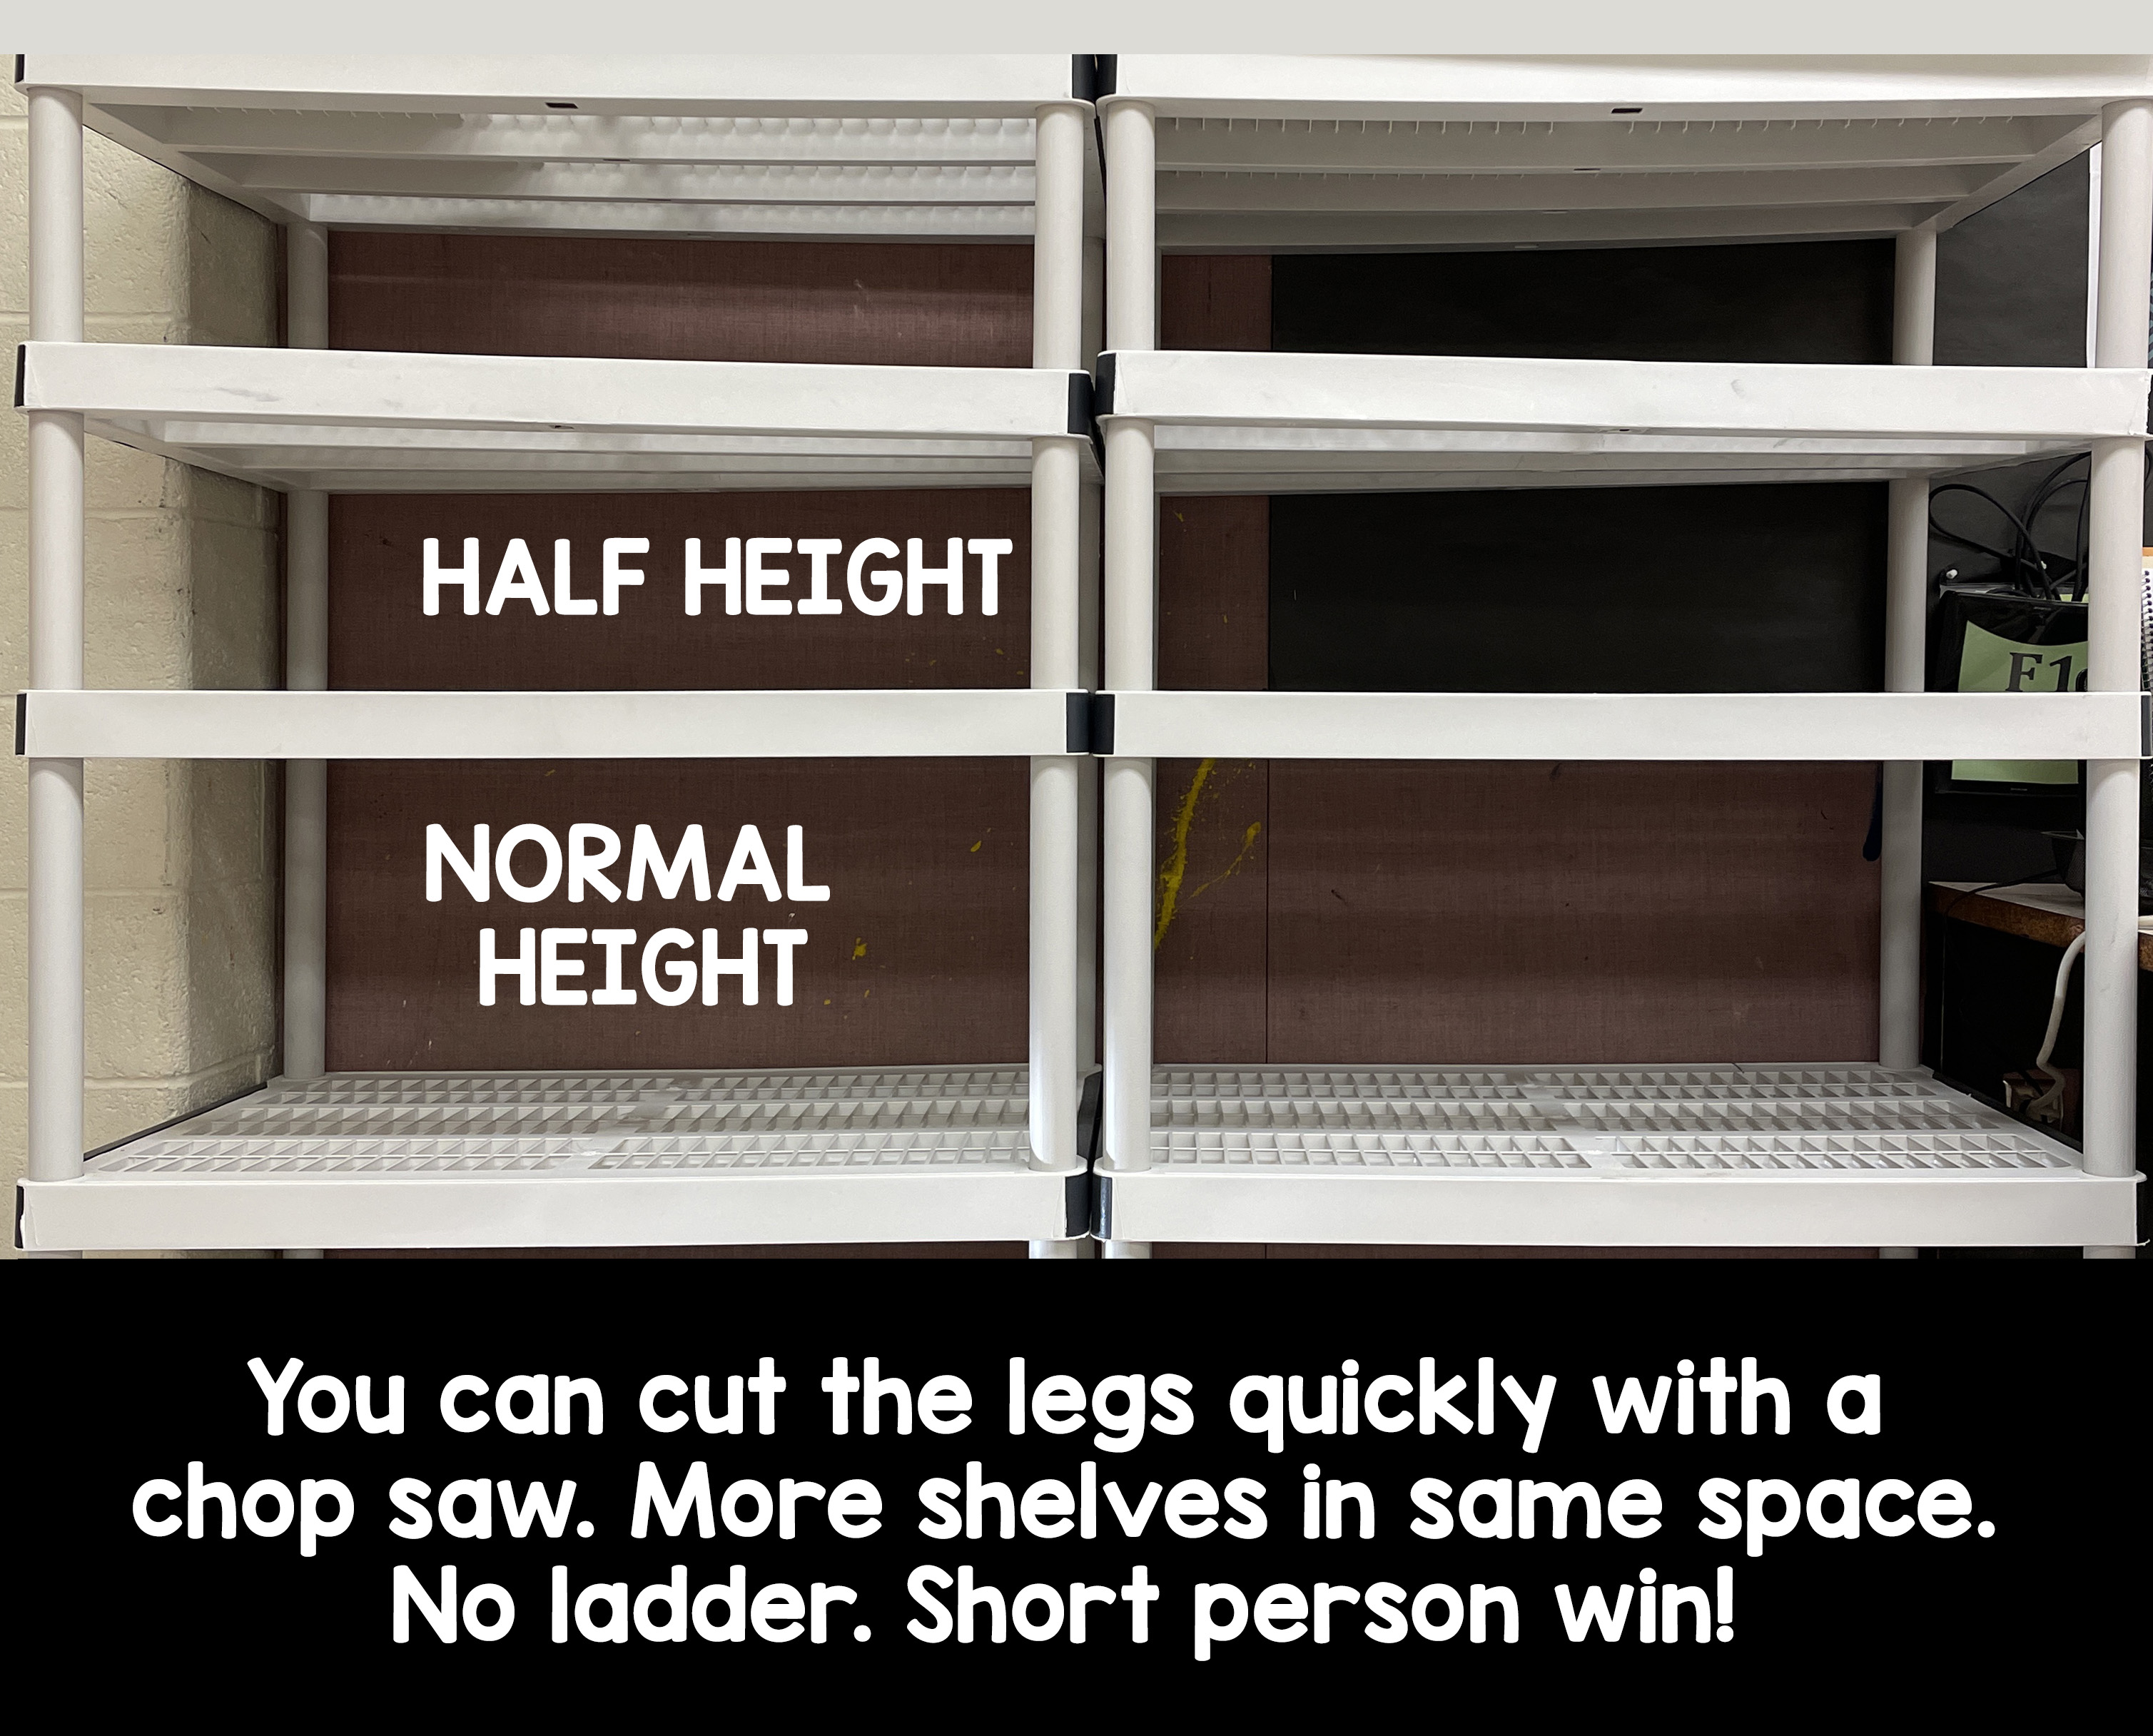
3D work goes on the shelf labeled for their class. I cut down the legs of the snap together plastic shelving so I can fit more shelves and still reach the top.


Q. How do you have students submit work?
A. Students photograph their work. I use this powerpoint to teach them how to upload quality pix. They turn in the photos using our LMS (Schoology for me). They put the actual project into the grading box on a labeled shelf. If I can't see the work well enough in the picture, I can go to the box to find their work. Usually the picture is enough to jog my memory of what I have seen and been observing in class. It's a visual reminder.


Q. Do you assign seats for High School?
A. Yes and no. For all level 1 classes, they have assigned seats for the first 2-3 weeks to help me quickly learn their names. Around that point we start working on observational (still life) drawing, so then they choose their seat so they get the view they want to draw.


Q. How do you grade High School Art?
A. Project rubric for all studio projects. And by this I mean an articulated rubric. I am not a fan of printing a giant sheet of paper when you are just changing the word inside the block from "Outstanding" to fair. Sorry. If I'm going through the trouble, then each block is going to specifically say what is different. 


Q. Do you do bell ringers or warm ups?
A. Yes. We are on 78 minute blocks now, but I also did them when I had 41 minute periods. I believe students need that transition time. This post explains how it's a great way to slip in more art history.


Q. Do you decorate your room or have a theme?
A. I post the elements and principles of art (mini posters) on my cabinet doors. I have a set of beautiful posters that were free from amplifier.org that I hang behind my desk. It was a giant mauve bulletin board, and I used black butcher paper to cover the horrendous color first.


I'm a fan of "less is more" so I do not have borders, or crazy printed wallpaper or 1,000 paint chip samples glued to my desk. If that's your jam, go for it! I also don't have student painted ceiling tiles or murals because I have inherited rooms with them in the past and it makes the room feel small and chaotic. I would highly encourage new teachers to have kids do this on a canvas or butcher paper, especially if your district moves people or rooms frequently. 


Q. Table bins or individual supplies?
A. For hard goods: scissors, rulers, etc I have bins on my counters and they self serve, 
     
For painting, I have 20 sets of brushes in a cardboard "packet" that is shared between classes. So when student #1 is done, they put it in the #1 spot. When my 2nd class comes in, if student #1 has messy brushes they tell me and I discuss with that student the next day and they have to show me their paint set before they leave each day.  I've also used the over the door shoe pocket holders for this purpose.


Every student gets a personal art kit that they should have one them every day. We started this during the pandemic and it has been a time saver. Once our drop/add period is over, each student gets a gallon sized ziplock bag with 2H, 2B & 5B pencil, one eraser, one pencil sharpener, one black sharpie, one cheap stylus (for digital work) and a glue stick. The last two years I gave a watercolor set, brush, about 10 feet of plaster craft in a brown paper bag stapled shut. I told them to take these items home in case they got quarantined or the school was closed. See how I made cheap watercolor kits for each student.


Q. How do you group / organize supplies
A. I am lucky enough to have about 160 of these sliding bins. Don't be too jealous, I do not have a proper closet. My room is like a math room with a sink. Also not everything conveniently fits in something 3" high. But I work with what I have. Because there are so many, I keep my supplies in alphabetical order. It helps me remember where they are or if I need to direct a kid to get them, I can more easily explain where they are.


If we are using colored pencil, I will pull those bins out and place on the counter / window sill until that project is over. I keep them sorted by color and used scraps of cardboard to help subdivide the bins (but you could totally buy mini bins at the dollar store.


Utensil organizers are also good for separating colors or types of paint brushes.


What other organization questions do you have?


Monday, January 10, 2022

Individual paint kits for students

 During the pandemic I created and sent kits home for each student. I was worried about my limited budget and things getting lost or not returned. I came up with a paint solution that was convenient and cheap. It is not, however quick unless you are already doing some of these things (which I was).


First, I took all of the strips out of my existing used paint sets. I washed them, but you don't have to.

Next, I unpacked all of my new refills. (save the BOX and the plastic trays - you'll need them)


I put the refills into the strips BY COLOR.


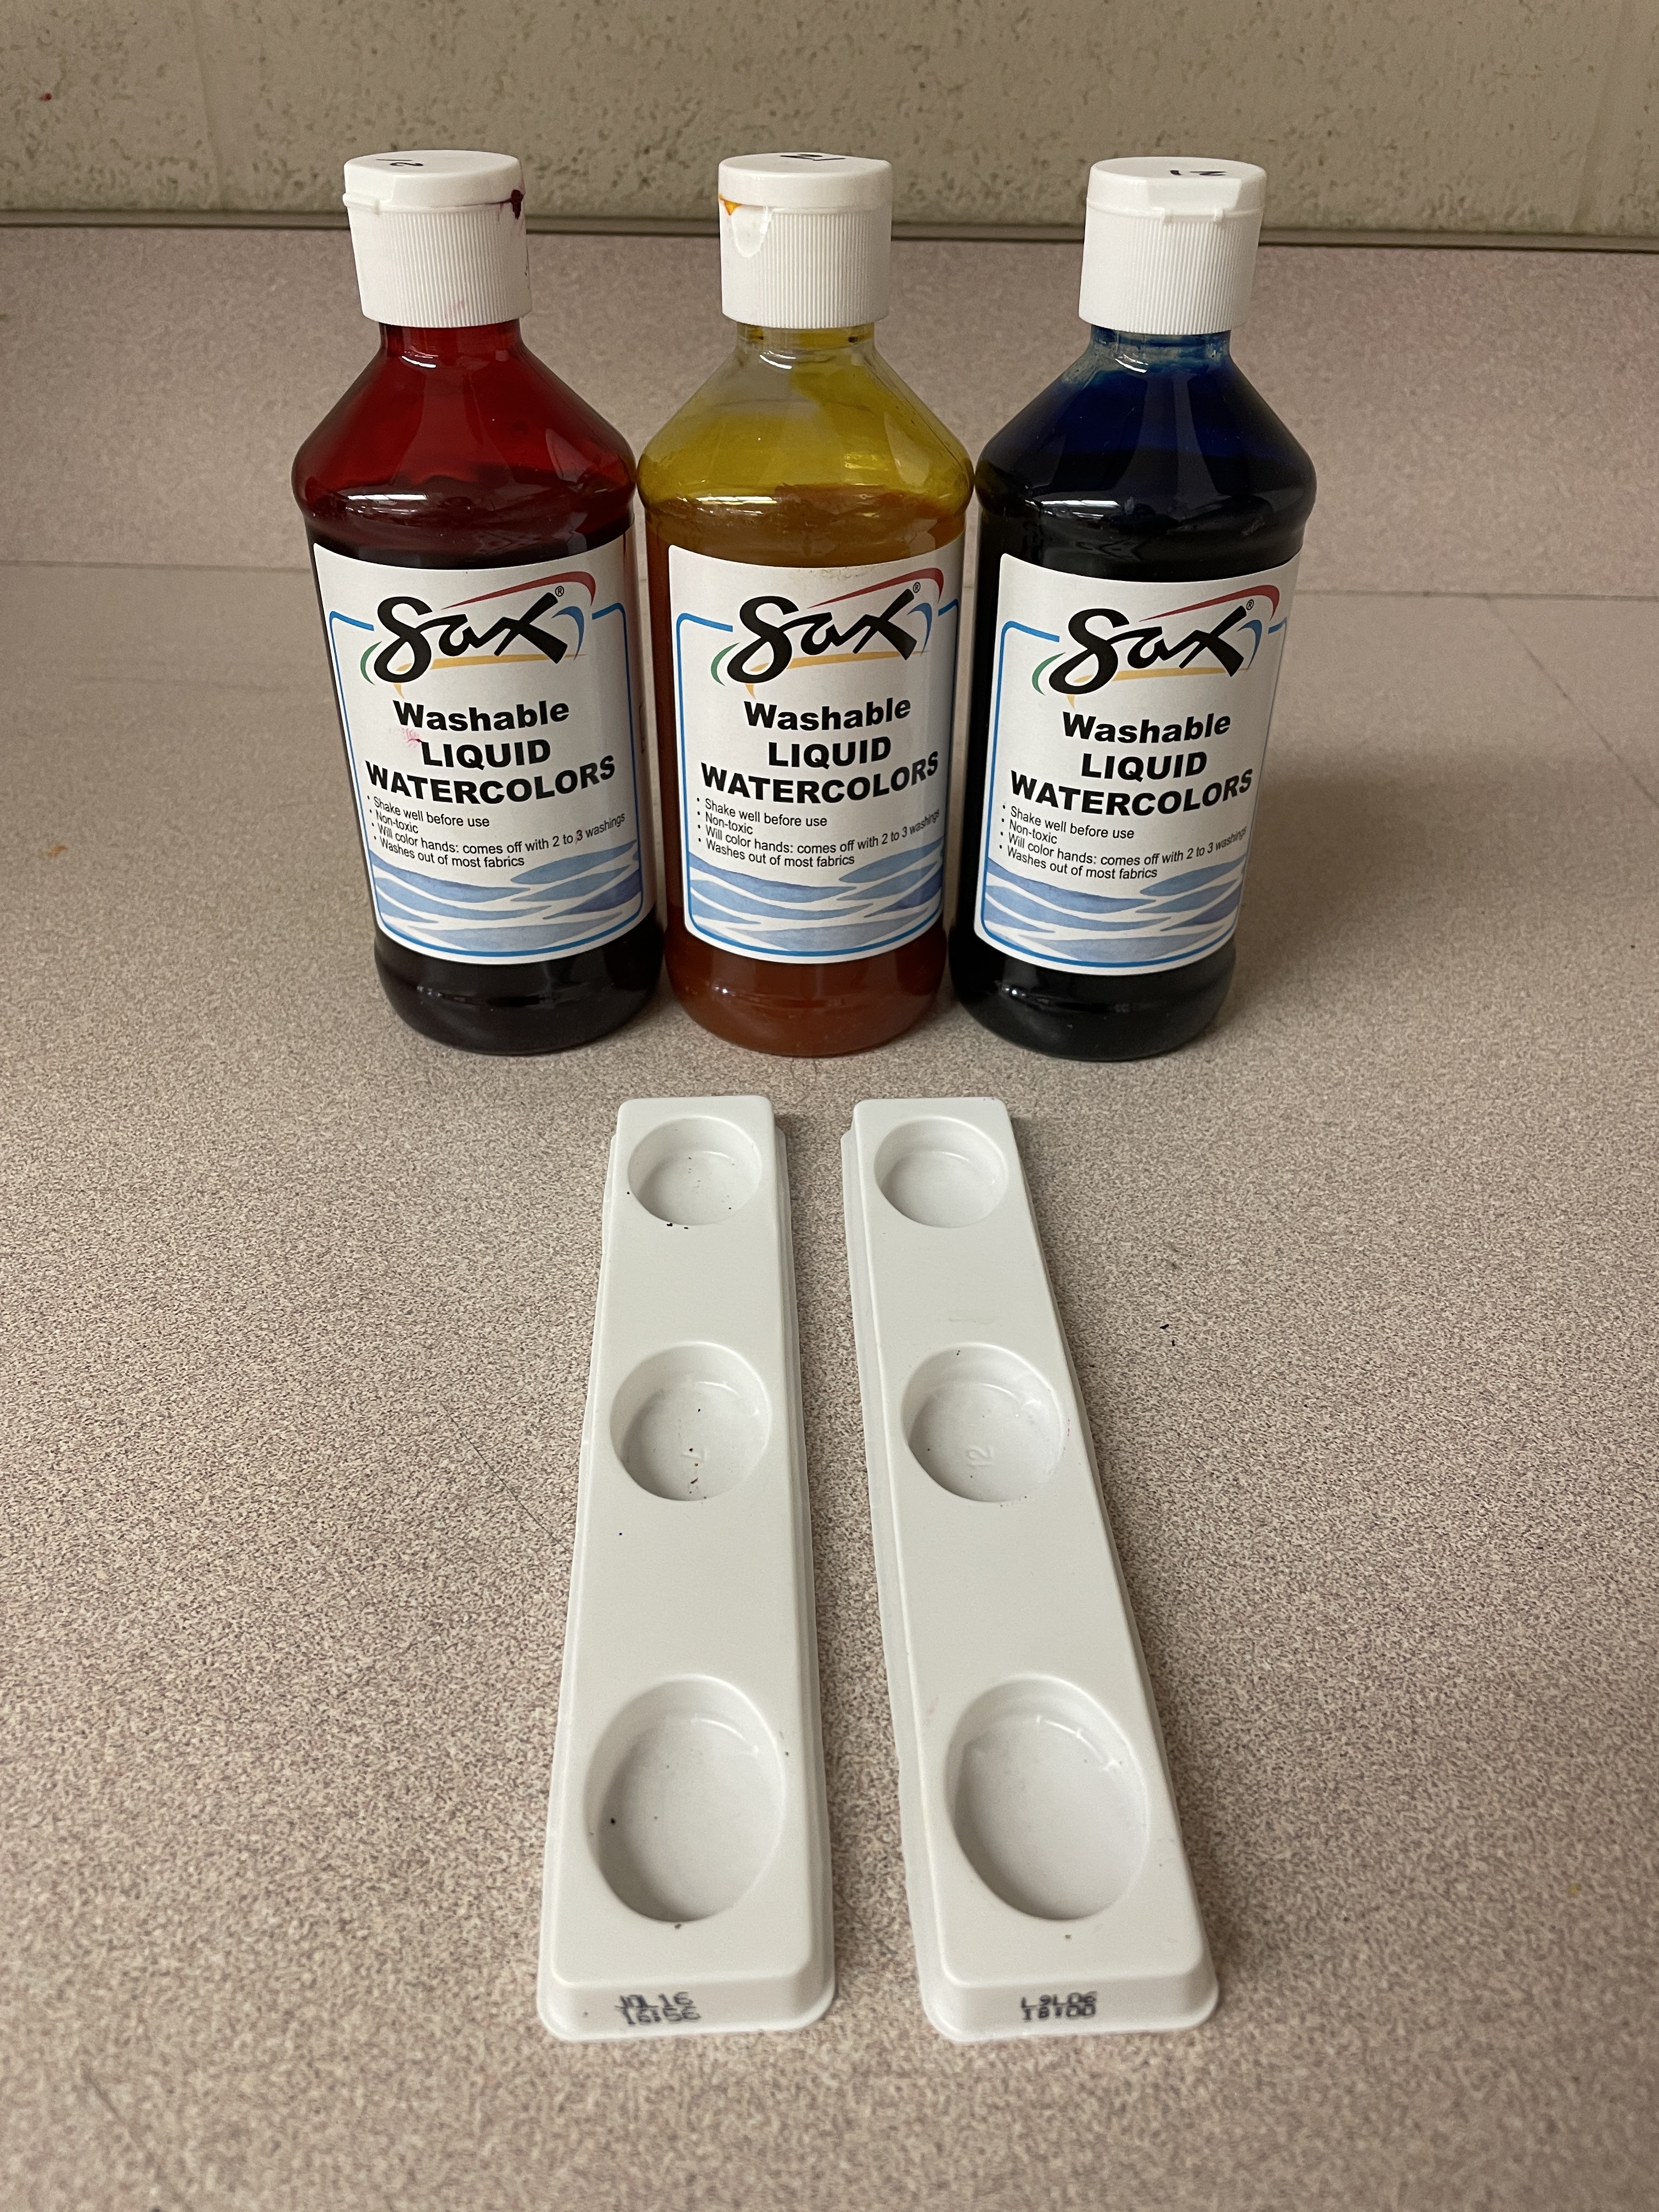
Now grab the empty refill packaging. Put the used paints into these. Six fit in a box. Primary and secondary colors only. Slide both trays in the box and send it home!


Option 2: Instead of popping the old paints in, you can also fill the little pans with liquid watercolor paint. 


It does take a little time to dry, but you don't need more than a few drops for them to do a painting.


Tuesday, July 7, 2020

Clear the lists part 2

Last summer social media was on fire with kind souls everywhere helping teachers clear their back to school shopping lists. This year, like many of you, I really am not sure what or when I should be ordering.

As the current situation has our schools and communities more closely connected how do we leverage our relationships and how do we work together to provide for our students?

I keep circling back to the idea that no one is eating in restaurants right now. In our town, almost every restaurant offers a 4-pack of crayons to kids while they wait for food. If ONE of those restaurants stepped up and donated the crayons that are sitting unused, that frees up my budget to send home more paper, or markers, or maybe even model magic.


And that's how the ripple starts. What else in your community isn't being used right now. How could that item have a positive impact on education?


So, given the current situation, what is on your wish list this year? Links to my previous versions of an art teacher  Wish List and donation request. I have a downloadable file of 30 variations here and a brand new 100% editable version here.


I'm thinking this year I would need:

  • Extra masks (for when kids inevitably have an accident with their own)
  • Ziplock bags for each child to hold personal supplies
  • Disinfecting wipes
  • Crayons to send home for kids who don't have them
  • Document camera for teaching from home
  • Hot Spots for families without internet access


Thursday, July 2, 2020

Art Teacher Summer Prep List

Contrary to public opinion, most teachers spend some portion of the summer thinking about the next school year. Some of us start that thinking the day after graduation. For others it's when the administrative welcome back letter hits the mail (or inbox). For many of us, it's right after the 4th of July when stores fill aisles with back to school supplies. We grab a few extra boxes of crayons for the kids who we know will not have their own. Maybe we purchase a new insulated lunchbox for ourselves. If you're an art teacher you might be grabbing ALL. THE. RAINBOW. ORGANIZERS.


I like the ability to take time over the summer to reflect on what worked, and tweak my curriculum. As I mentioned last week, I have been transferred back to the high school level. So whatever level of crazy this unpredictable year had in store for me, now feels magnified. I don't want to feel like I've wasted or squandered these precious days of leisurely planning at my own pace, so I started to think what can I do now, that will be helpful no matter what. 


Here's what I came up with. Maybe it will help those of you spinning your wheels, wanting to take action, but feeling paralyzed with indecision. 

1. Take inventory of your current classroom supplies:
My new principal allowed me a block of time to go in and see what the other teacher left behind. If you think you may be denied...you could try from the point of view that you are looking with fresh eyes on ways to save money. I used my phone and videotaped the entire room. Opening every drawer and cabinet. 


2. Look for inspiration of new artists. Try following working artists, art museums, galleries and art schools, as well as art teachers on social media. I find searching and subscribing to tags of subject matter, technique or media yields better results than something like "artteachersofinsta" where many members seem to post the same content. Almost every art supply brand has free tutorials posted online.


3.  Look through the supply catalog:
What materials would be helpful for fall. Imagine you had an unlimited budget and go crazy. When I'm looking through that bad boy in the summer...it's like making my Christmas wish list from the JC Penney Toy Book all over again. You can find ways to do it cheaper. Looking will give you the ideas and inspiration. Last week I found a series of videos from Strathmore when I saw they were offering "Educational sketchbooks with video links" in my cataglog. Do you have technology available for students to draw digitally? Now might be the time to do a "big ask" of your admin. Think of all the money they will save on sending home paper and markers by loading some quality software onto the ipads. 


4. Take a class:
Watch that you tuber, try the free subscription to skillshare, join a supportive art-making group. It's good to cross-pollinate. Never done weaving? Try it. Want to learn photoshop even though you will never use it with your students? Give it a whirl. Need to jump to the next column on your pay matrix. Go get it! Watching how others teach adds to your pedagogical tool belt. I look at how online teachers are transitioning. How much talking and explaining. What scaffolding do they provide. It's still fun for me, but I'm also growing my art teacher skills. 


5. Review standards with fresh eyes:
Look through your district approved curriculum guide, or in the absence of one, the national visual art standards. I like to make a checklist at the end of each year and go through my plans to see what what I've hit and where I need to do better. Many of us have been looking to see where we can be more inclusive with regards to BIPOC artists. Now is a great time to diversify your curriculum. When you find something you're missing, ask yourself if you can teach that content remotely. If you have to revise your lessons anyway use the time to work smarter. Here's my free K-5 checklist.


6. Sort your project list:
Take a look at the projects your students created this year. Use a hi-lighter or another system to code them. What skills can/must be done in classroom? What can be done with a paper packet? What needs video? What can be done from a cart? Even if you don't know what the year will look like, when you do, you have a list ready to go.


7. Cart shop:
Are you possibly on a cart? What does your dream cart look like? Will the school buy you one or do you have to upcycle a scary old clunker? Use this time to think about how you would retro-fit your cart(s). Not sure how to start the cart conversation with your admin? Here's a list I put together.


8. Kit planning:
Have you been instructed to make a care package of basic supplies? If not yet, chances are you might. What would it look like? What do they need. Can you find a local restaurant that gives crayons with meals? Would they be willing to donate some boxes for good publicity? Why not ask. If you promise to tag them on social media, with student artwork, it would probably be an easy decision for them.  Is your district willing to put out a survey to find out what supplies kids have? Many districts do this for technology, but it would be great to include a few questions about who needs paper, scissors or crayons.


9. Videos
A few years ago when I started making videos, I found that I had more time, not less in my day. Record videos with the dual purpose of teaching remotely, and also saving your sanity when we're back in the classroom. 


10. Prepare Your Online Classroom
Just as you would go in and set up your physical space over the summer, take some care to set up your online space. I'm not talking about spending 8 hours rearranging the furniture of your bitmoji classroom. Think of the set up and structure of Google Classroom, Schoology, Seesaw or other learning platform. This year artsonia is offering streamlined uploading connect to Google Classroom, but you have to set up your classes individually. If your district doesn't import them for you, this may take time. Think about what worked last year and what didn't. I have a free "how to attach files" cheat sheet for students because it was draining to type the same info over and over again. In this way, I could upload it and assign it to the students who claimed they had no idea how to load a picture of their work. Grab a copy here.


I know this sounds like a lot. And it is. For me, I know that none of these steps will be wasted time or energy. So instead of being sad or anxious that I don't know what to do to prepare, I'm doing the things I can. Did you know you can do 5 out of 10 of these items while binge-watching netflix and eating raw cookie dough? True Story.

What have you found to be helpful in planning for the new school year?

Monday, June 15, 2020

Have Wheels Will Travel


Two years ago there was a good chance that I was going to lose my art room. In preparation for meeting with my principal I jotted down all of my questions. You know, at 2am when the thought of moving my room onto a cart played non-stop in my mind. I know many art teachers are going to be tasked with this challenge in the fall so when I came across the list while archiving files tonight, I wanted to share it. In no particular order:

  • When will I/we be able to provide input on what supports we will need to make this happen?
  • What area will be provided for the following:
    • Storage of materials
    • Storage (drying space) for wet items
    • Storage of work for art show
    • Storage of student work in progress
    • Storage of clay while drying out for kiln (or 3D work in progress)
  • What accommodations can be made for hand washing in absence of sink?
    • If purchasing baby wipes, will those items come out of general budget?
    • Will a para-professional be available to escort younger students to bathroom for clean up?
  • What time will be allotted for the loading and unloading of cart each day?(Beyond planning time). Will need 20 minutes to load and unload daily. This should not be part of planning period.
  • What system will we have in place for classroom teachers to provide seating charts and updates as they occur?
  • What changes will be made to schedule to allow passing time for moving between rooms?
  • What changes will be made to schedule to minimize need for elevator use?
  • What areas of classroom will be available for LAMP teachers to use during classes? This should be standardized and presented to staff so it is not up to individual teacher preference. I need access to Projectors, Doc Cam, Whiteboards, Counter Space and sinks
  • What is the budget for ordering carts to accommodate the needs of six grade levels of supplies? Recommend 2 grade levels per cart and 1 drying rack per floor.
  • What space has been designated for classroom teachers to utilize outside of their room while I am teaching?


Wednesday, February 12, 2020

magnetic photo frames

These 4x6 magnetic photo frames are great for organizing supplies on my metal carts.


I have extra pictures behind the front label, so I can quickly swap things out if needed. I get mine at a local photo store, but you can find similar here.


I have also used them in the past to organize my goals, etc on the whiteboard


(or in this case, ancient green board). More on this system here.


All my favorite art teacher organization hacks are included in this free download.

Wednesday, September 4, 2019

Happy Art Room Decor

Super excited to kick off the new year in ONE BUILDING. It's been so nice to have time at night to work on fun little signs and things. Since I get to be in one place I want to make sure it's a space I love to see at 7:15 every day.

If you need some signs, labels, binder covers, whatever...I gotcha covered in my new decor bundles. Check 'em out!


I definitely need to take photos of my room. I keep thinking of "just one more thing" to print and hang and then it will be ready. By now I should know that's never going to end. Always more to do.


What's your favorite part of your room decor?

Tuesday, July 23, 2019

Donations

Last year I tried something new at open house. I discreetly hung a sign with a list of items I needed for my classroom. Not art supplies, but the other things that you need, but don't want to waste your limited and precious budget on. Ya know...things like tissues. I had previously been pretty grumpy over classroom teachers getting all that stuff donated and I was putting it on my weekly shopping list. And you know what. Parents were happy to donate. It just never occurred to them that "Hey, my kid blows his nose in art class, too."
 wish list


This year I'm paring down that list so that I really target the couple things that I really need. For me it's baby wipes, tissues, ziploc bags and disinfecting wipes. What I'm going to try this year is blasting my list on social media with the hopes that parents bring these items to open house with them. I'm also requesting they label items "art room" because I'm sure some kids have NO IDEA why mom packed a bunch of clorox wipes in their book bag and they just hand it over to their classroom teacher.

If you'd like some cute signs to politely ask for the items you're always buying you can find them here.

Saturday, July 20, 2019

Beyond the basic bead with polymer clay


I've been revisiting some of my high school lessons to see if anything makes sense to bring down to the elementary level. Given their huge success rate with polymer clay on the bobbleheads, I may try some basic jewelry making again this year. A few years ago, some of my fourth grade classes created beads that were accents to their arcimboldo shrinky dink heads.


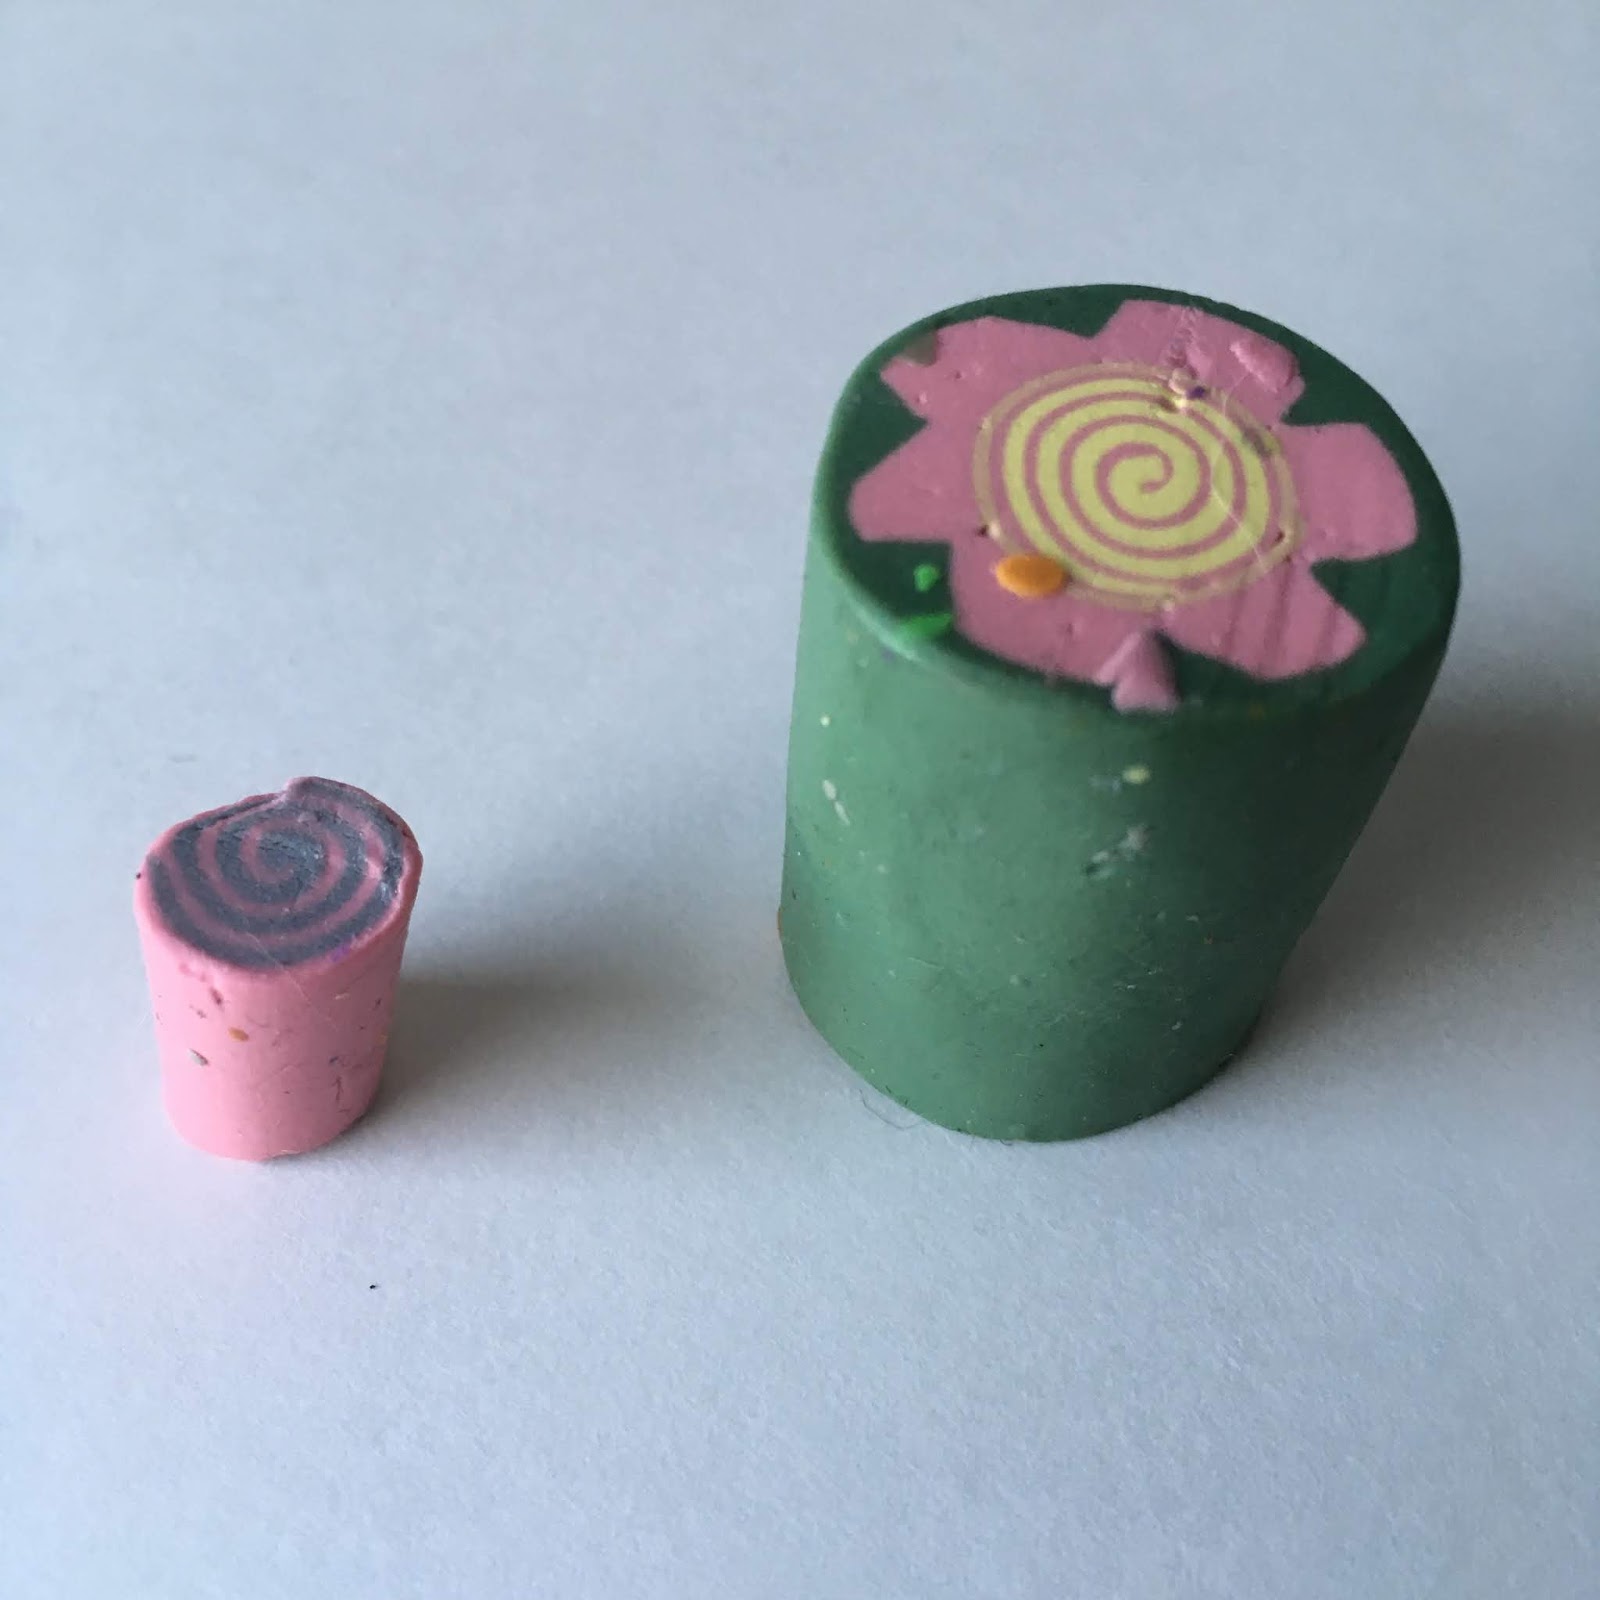
I'd love to have them try some advanced methods like caning.


The samples here were made by my high school students in a contemporary crafts class.


It's such a great way to introduce unity, variety, repetition and emphasis


I love to watch them go beyond the basic bead and explore a variety of shapes.


Here's a link to the high school lesson plan.
And here is where you can get my video tutorial and lesson plan that would be great for 4th-6th grade.

Wednesday, May 22, 2019

New Art Teachers Save Your Sanity

This is about the time of year that the facebook groups are alive with newly hired teachers. Excited and maybe a little overwhelmed they are ready for the next phase of their journey. I saw a few posts today and it reminded me to update my art teacher's guide to organization. With my new room (Room #14 in my 14 year teaching career...but who's keeping track?) came new challenges and new opportunities. I'm already excited thinking about how I'll be reinventing that space next year. But in the meantime, please enjoy this free guide!

Here are some of the new features:

Art Gallery Helper Station

Artsonia Binder 


Supply Cart with Magnet Labels


Finally... The Eraser Garage. It's life changing. For real.


If you're a first (or second) year art teacher...this guide specially designed for the questions of new art teachers may be just the thing for you.


Friday, April 26, 2019

Shoebox animation

Our 3rd graders have been hard at work on their claymation project. We started with dry erase title sequences. Original post here. Over the past week they have begun creating their characters out of Crayola modeling clay. Since I do not have a large storage closet I had to think about how we would keep their sculptures and props safe from week to week.


A few weeks before the project, I asked staff to donate any shoeboxes they wanted to get rid of. Each table was assigned a box. This provided a safe, stackable storage solution and also gives them structure to work in.


Here is a project stored inside the box. Since this project was funded with an art education grant from crayola, I gave each table their own box of modeling clay. They have to be responsible to making sure it lasts throughout the assignment. So at the end of class it all goes back in the box.


Here is the box unpacked, set up and ready for filming. 


Next week they will begin working on credits using dry erase again.


The lesson plan and support documents are already prepped for you here.